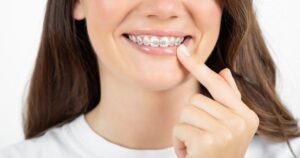
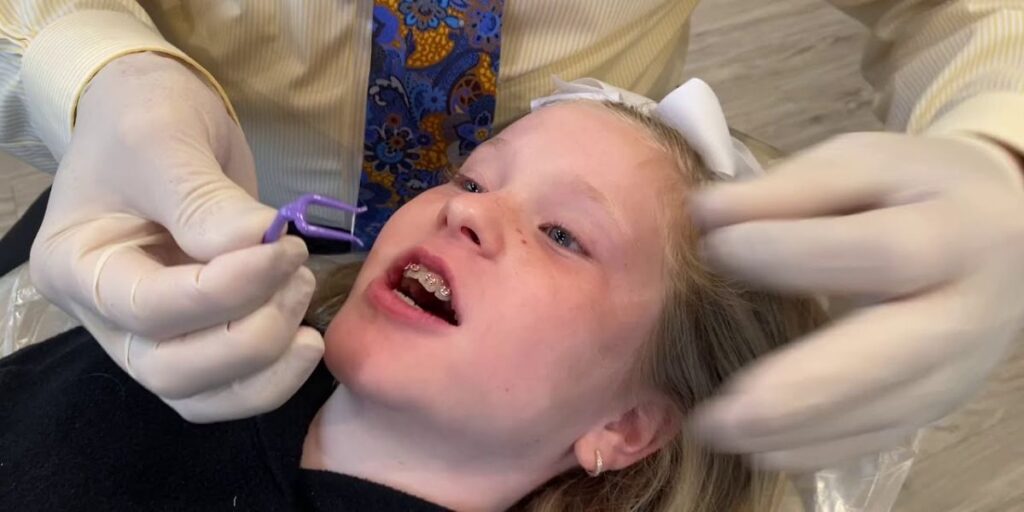
Maintaining good oral hygiene is crucial when you have braces, as the brackets, wires, and other components can trap food particles and plaque, leading to issues like gum disease and tooth decay.
Flossing is an essential part of this process, but it can be challenging to navigate around the braces. In this comprehensive guide, we’ll explore four different ways to floss effectively with braces, along with their pros and cons, to help you find the method that works best for you.
How to Floss with Braces: 4 Different Ways
Using Ordinary Floss
The traditional method of flossing involves threading regular dental floss under the wire, hugging the tooth, and sliding it up and down to remove plaque and food debris. While this approach can work with braces, it can be time-consuming and challenging, especially in the early stages when the wires are tighter.
Using a Floss Threader
A floss threader is a small, inexpensive tool designed to simplify the flossing process when you have braces. It consists of a rigid plastic loop at one end and a thin, stiff end that can be easily threaded under the wire.
To use a floss threader with braces, follow these steps:
- Cut a piece of floss about 18 inches long and thread it through the loop of the floss threader.
- Gently guide the stiff end of the floss threader under the wire, being careful not to dislodge it.
- Once the stiff end is through, pull the floss through until it’s taut.
- Hug the floss against the tooth and gently move it up and down, removing any plaque or food particles.
- Repeat the process for each tooth, using a clean section of floss for each one.
Using a Water Flosser
A water flosser, also known as an oral irrigator or Waterpik, is an effective alternative for flossing with braces. It uses a stream of pressurized water to dislodge plaque and food debris between teeth and around braces.
To use a water flosser with braces, follow these steps:
- Fill the water reservoir with lukewarm water and attach the appropriate tip.
- Lean over the sink and position the tip close to your gum line, being careful not to touch the braces.
- Turn on the water flosser and allow the water to flow between your teeth and around the braces.
- Adjust the pressure and angle as needed to ensure thorough cleaning.
Exploring Other Options
In addition to regular floss, floss threaders, and water flossers, there are other specialized tools designed to make flossing with braces easier. These include:
- Superfloss: A type of floss with a stiff end for threading under the wire and a spongy floss section for cleaning around the brackets.
- Orthodontic flossers: Tools like the Platypus Flosser and Harp Flosser, which feature a pre-threaded floss loop and a rigid plastic handle for easy maneuvering around braces.
Best Floss for Braces to Prevent Gum Bleeding
Bleeding when flossing with braces? Don’t worry, the right floss can save the day! Here’s the lowdown:
1. Waxed Floss: Your go-to! Wax helps it slide under wires and between teeth, preventing snags and gum irritation.
2. Super Floss: This champion has 3 sections: stiff end for threading, spongy part for cleaning around brackets, and regular floss for under the gums.
3. Water Flosser: Consider this electric tool! A pulsating water stream removes plaque effectively, especially around braces.
4. Gentle Technique: Be patient! Braces require finesse. Take time, curve the floss around brackets, and floss under the gumline gently.
5. Fluoride Boost: Bonus points for floss with fluoride! It strengthens enamel and fights cavities, double win!
Remember: Consult your dentist for personalized recommendations based on your specific needs. Happy flossing!
Why is Flossing With Braces So Important?
Flossing is crucial when you have braces because the brackets, wires, and other components create more nooks and crannies where plaque and food particles, especially for Floss With Braces, can accumulate. If left unchecked, this buildup can lead to gum disease, cavities, and even staining or discoloration of the teeth.
Daily flossing, in combination with brushing and regular dental check-ups, helps remove this buildup and maintain a healthy, beautiful smile throughout your orthodontic treatment.
How to Floss With Braces Using a Floss Threader
Using a floss threader is one of the most popular and effective methods for flossing with braces.
Here’s a step-by-step guide:
- Cut a piece of floss about 18 inches long and thread it through the loop of the floss threader.
- Gently guide the stiff end of the floss threader under the wire, being careful not to dislodge it.
- Once the stiff end is through, pull the floss through until it’s taut.
- Hug the floss against the tooth and gently move it up and down, removing any plaque or food particles.
- Repeat the process for each tooth, using a clean section of floss for each one.
The Pros of Using a Floss Threader to Floss With Braces:
- Inexpensive and widely available
- Allows for precise flossing around each tooth and bracket
- Rigid end makes it easier to thread under tight wires
The Cons of Using a Floss Threader to Floss With Braces:
- Can be time-consuming to thread the floss for each tooth
- Risk of dislodging or bending the wire if not careful
How to Floss With Braces Using Superfloss
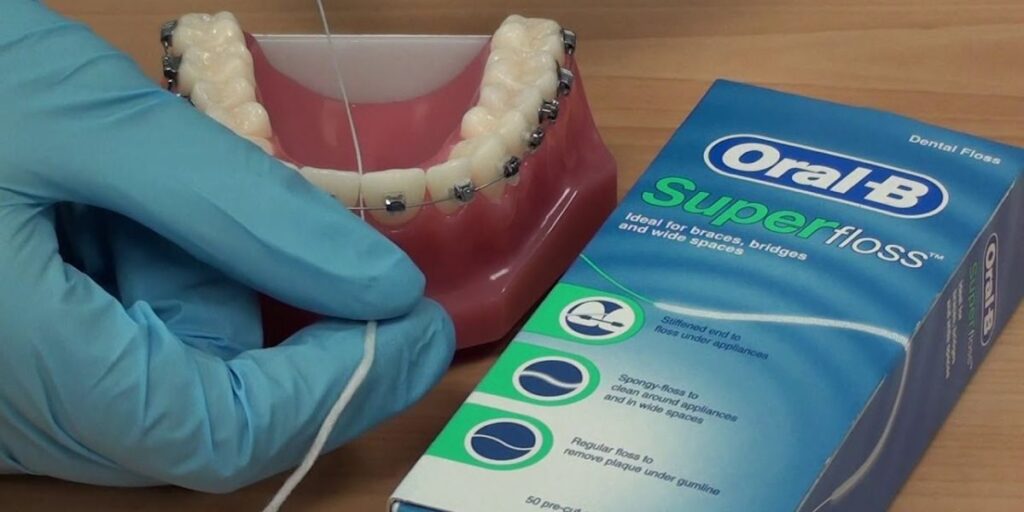
Superfloss is a specialized type of floss designed for use with braces. It features a stiff end for threading under the wire, a fuzzy middle section for cleaning around the brackets, and a regular floss segment for flossing between teeth.
To use Superfloss with braces, follow these steps:
- Cut a piece of Superfloss about 18 inches long.
- Gently guide the stiff end under the wire, being careful not to dislodge it.
- Once the stiff end is through, pull the fuzzy middle section through until it’s taut.
- Gently move the fuzzy section up and down to clean around the brackets.
- Use the regular floss segment to floss between teeth, hugging the floss against each tooth and sliding it up and down.
- Repeat the process for each tooth, using a clean section of Superfloss for each one.
The Pros of Using Superfloss to Floss With Braces:
- Designed specifically for use with braces
- Fuzzy middle section helps clean around brackets more effectively
- Combination of stiff end, fuzzy section, and regular floss in one product
The Cons of Using Superfloss to Floss With Braces:
- More expensive than regular floss
- Can be tricky to thread the stiff end under tight wires
How to Floss With Braces Using a Platypus Orthodontic Flosser
The Platypus Orthodontic Flosser is a specialized tool designed to make flossing with braces easier. It features a pre-threaded floss loop and a rigid plastic handle for easy maneuvering around braces.
To use a Platypus Orthodontic Flosser with braces, follow these steps:
- Hold the handle firmly and guide the floss loop under the wire, being careful not to dislodge it.
- Once the floss is through, gently move the handle up and down to floss between the teeth and around the brackets.
- Repeat the process for each tooth, using a clean section of the pre-threaded floss loop for each one.
The Pros of Using a Platypus Orthodontic Flosser to Floss With Braces:
- Pre-threaded floss loop makes it easier to maneuver around braces
- Rigid handle provides better control and precision
- Designed specifically for use with braces
The Cons of Using a Platypus Orthodontic Flosser to Floss With Braces:
- More expensive than regular floss or floss threaders
- May not fit well in tight spaces, especially in the early stages of treatment
How to Floss With Braces Using a Harp Orthodontic Flosser
Similar to the Platypus Flosser, the Harp Orthodontic Flosser is a specialized tool designed for flossing with braces. It features a pre-threaded floss loop and a rigid handle, but with a slightly different shape and design.
To use a Harp Orthodontic Flosser with braces, follow these steps:
- Hold the handle firmly and guide the floss loop under the wire, being careful not to dislodge it.
- Once the floss is through, gently move the handle up and down to floss between the teeth and around the brackets.
- Repeat the process for each tooth, using a clean section of the pre-threaded floss loop for each one.
The Pros of Using a Harp Orthodontic Flosser to Floss With Braces:
- Pre-threaded floss loop makes it easier to maneuver around braces
- Rigid handle provides better control and precision
- Designed specifically for use with braces
The Cons of Using a Harp Orthodontic Flosser to Floss With Braces:
- More expensive than regular floss or floss threaders
- May not fit well in tight spaces, especially in the early stages of treatment
How to Floss With Braces Using a Waterpik or Water Flosser
A Waterpik or water flosser is an effective alternative for flossing with braces. It uses a stream of pressurized water to dislodge plaque and food debris between teeth and around braces.
To use a water flosser with braces, follow these steps:
- Fill the water reservoir with lukewarm water and attach the appropriate tip.
- Lean over the sink and position the tip close to your gum line, being careful not to touch the braces.
- Turn on the water flosser and allow the water to flow between your teeth and around the braces.
- Adjust the pressure and angle as needed to ensure thorough cleaning.
The Pros of Using a Waterpik or Water Flosser to Floss With Braces:
- Easy to use and maneuver around braces
- Thorough cleaning with the pressurized water stream
- Can help dislodge stubborn plaque and food particles
The Cons of Using a Waterpik or Water Flosser to Floss With Braces:
- Requires a separate device and refillable water reservoir
- May not reach all areas as effectively as traditional flossing
- Can be messy and may splash water around
Braces in Phoenix, Chandler, Maricopa, and Casa Grande
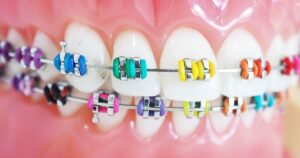
Phoenix, Chandler, Maricopa, and Casa Grande are all located in the Phoenix metropolitan area, which has a wide variety of orthodontists who offer braces. Braces are a type of dental appliance that is used to straighten teeth and correct bite problems. They can be made of metal, ceramic, or plastic, and they are typically attached to the teeth with brackets and wires.
The cost of braces varies depending on the type of braces used, the severity of the problem being treated, and the experience of the orthodontist. But, most orthodontists offer financing options to help make braces more affordable.
If you are considering getting braces, it is important to consult with an orthodontist to discuss your individual needs and goals. The orthodontist will be able to recommend the best type of braces for you and create a treatment plan that is right for you.
Here are some of the benefits of getting braces:
- Straighter teeth: Braces can help to straighten your teeth, which can improve your appearance and self-confidence.
- Improved oral health: Braces can also help to improve your oral health by making it easier to clean your teeth and gums.
- Better bite: Braces can help to correct bite problems, which can improve your speech and chewing ability.
If you are looking for an orthodontist in Phoenix, Chandler, Maricopa, or Casa Grande, I recommend doing some research online to find a few orthodontists in your area who have good reviews. You can also ask your dentist for a referral.
Schedule a Free Braces Consultation For You or Your Child
Scheduling a free braces consultation for yourself or your child is a crucial step towards achieving a healthy and confident smile. During the consultation, an orthodontic specialist will assess your teeth and jaw alignment, discuss treatment options, and address any concerns you may have.
This appointment is an opportunity to learn about the benefits of braces, the treatment process, and financial options. It’s a proactive step towards improving oral health and boosting self-esteem. Schedule your consultation today and take the first step towards a straighter smile!
Related Post: List Of Atf Approved Pistol Braces
Conclusion
Flossing with braces can be challenging, but it’s a crucial part of maintaining a healthy, beautiful smile throughout your orthodontic treatment. By exploring the different flossing methods and tools available, you can find the approach that works best for you. Remember to be gentle, thorough, and consistent in your flossing routine, and don’t hesitate to consult with your orthodontist or dental professional if you have any questions or concerns.
People Also Ask (FAQ’s)
Can you floss with braces?
Yes, you can and should floss with braces to remove food particles and plaque between teeth and braces.
How often should you floss with braces?
It is recommended to floss at least once a day, ideally before bedtime, to maintain oral hygiene.
Are you supposed to floss before or after brushing your teeth?
You should floss before brushing to dislodge debris, making it easier for toothpaste to reach all tooth surfaces.
Is it ever too late to start flossing?
It is never too late to start flossing; it can improve oral health and prevent dental issues, even with braces.
Can I use a water flosser with braces?
Yes, a water flosser can be used as a supplement to traditional flossing for effective cleaning around braces.
Should I use waxed or unwaxed floss for braces?
Either can be used, but waxed floss may be less likely to get caught in braces and shred.
Is it normal for my gums to bleed when flossing with braces?
Some bleeding may occur initially, but it should diminish as you continue to floss regularly and maintain good oral hygiene.
Can I use a floss threader with braces?
Yes, a floss threader can help navigate floss under wires and between teeth for thorough cleaning with braces.